

Cloud Risk Management offers rule configuration for your cloud providers allowing you to adjust their behaviour
to meet your organisation's needs. For example, there are certain rules that should
not be run, some may need their severity adjusted and hence need configuration. While
other rules may be good to run as default and require no confugiration.
Once you configure a rule on an account, you can copy the same rule settings to other
accounts for which you have administrative privileges or full access.
Configurations
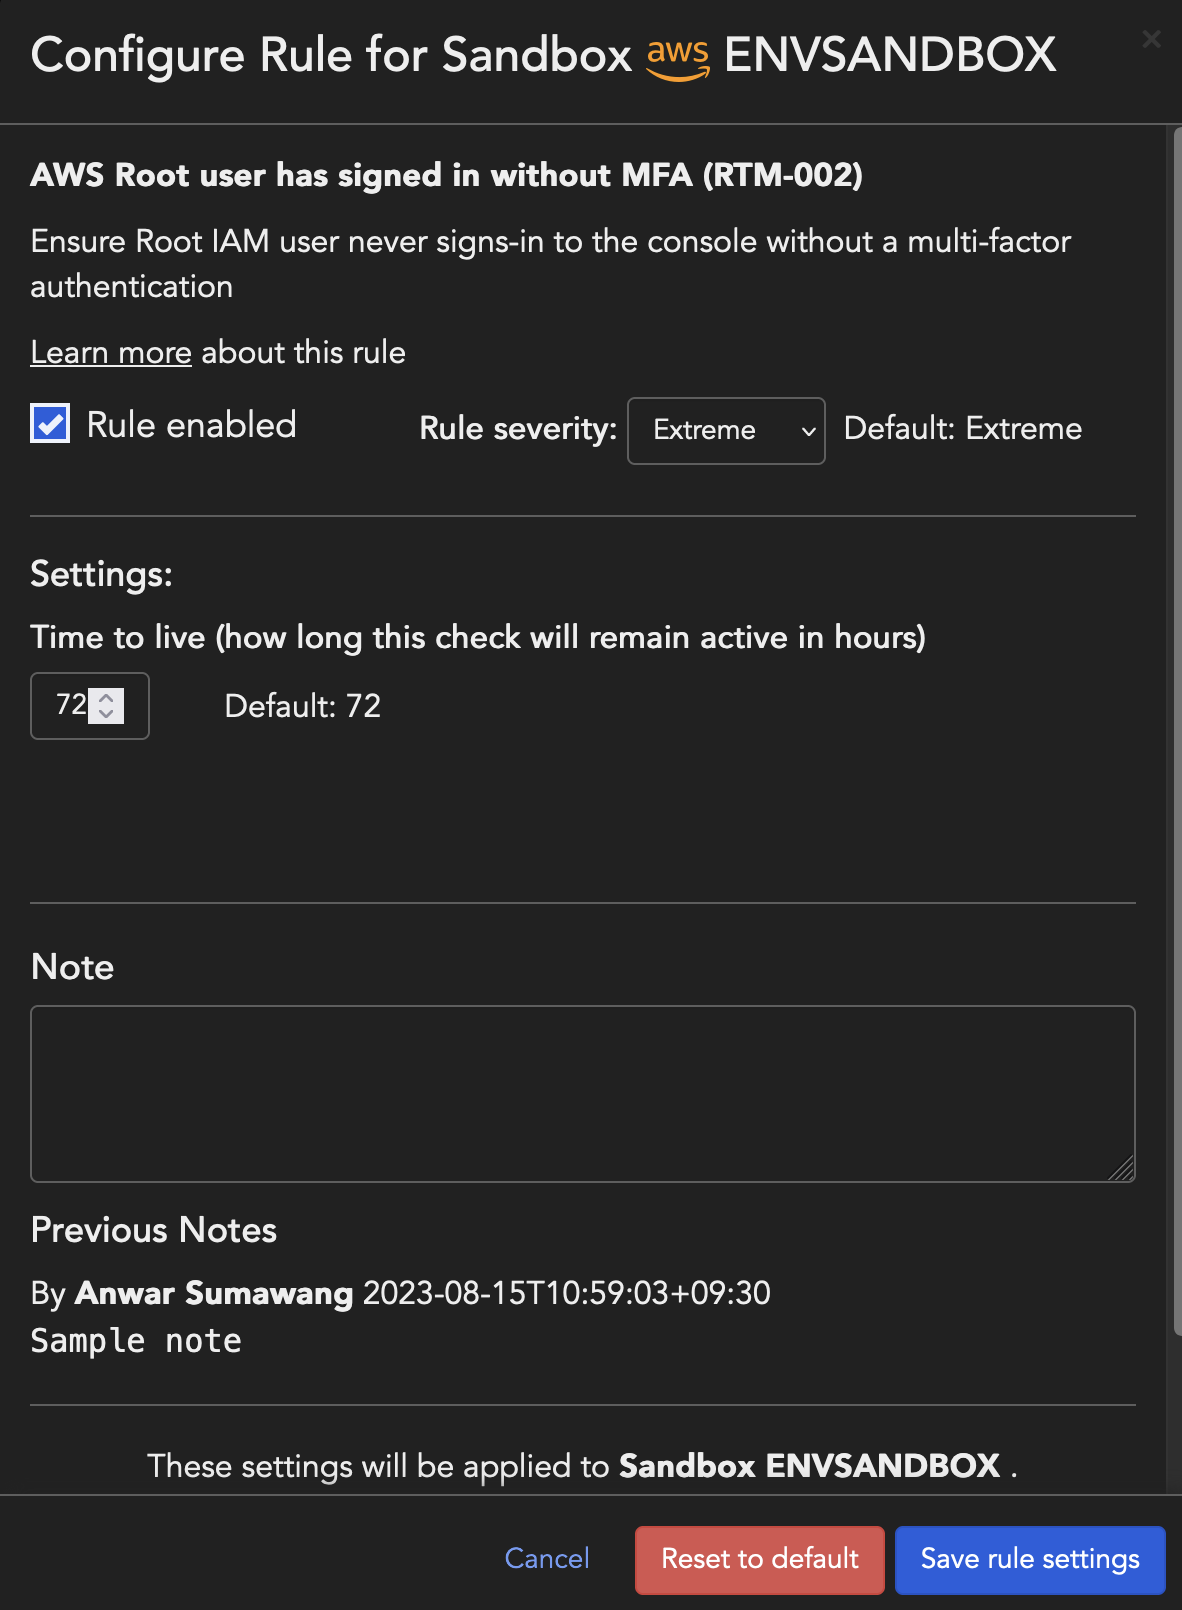
Disable rule
You can disable a rule if required by unchecking Rule enabled. On
disabling a rule, all violations will be removed and no more checks will be
performed until the rule is re-enabled.
Assign rule severity
Every rule has a default risk level associated with it, which can be modified by
selecting one of the following options from the Rule severity
drop-down:
- Extreme
- Very high
- High
- Medium
- Low
Time to live
Time to live (TTL) configuration allows you to specify the length of time a Check will be
displayed on the All Checks
Report. The configuration is only available for certain Rules that are
specific to Real Time Posture Monitoring.
For example:
- A user signs in without MFA. The rule AWS IAM user has signed in without MFA run against the resources associated with your cloud account to create an event on RTPM and a check on the All Checks Report
- This Check will be seen on the All Checks Report for the period specified in the Time to live (TTL) configuration for the rule
- After the TTL expires, the Check will be removed. Next time the user signs into their account without MFA, a new Check will be created
- However, the entire event history will still show in the Real Time Posture Monitoring dashboard
NoteTTL is designed in such a way that prevents Cloud Risk Management's notifications service
sending too many notifications for the same Check in a short period of time.
After the first notification is sent for a Check, the following Checks that are
identical to the one that has already been sent will be discarded during the TTL
period. Once the period expires, the Check is eligible to be notified again.
When exceptions are saved to an account’s Rule configuration, matching resources
will be immediately excluded from checks.
|
Set up rule exceptions
Rule exceptions can be configured so that the rule bypasses the resources which match
the exception input provided.
Note
|
You can set up exceptions in the following two ways:
- Tags - Either the tag key, the tag value or a combination in the format
tag_key::tag_valuecan be provided as input - Resource Id - Unique resource identifier determined by the cloud provider. You could also use regex expressions to configure exceptions.
-
Note: The format of a Resource Id varies depending on the resource type. To check a Resource ID, use the List Checks API.Resource Id Examples:
-
For most AWS resource types, the Resource Id is the ARN.
-
For AWS IAM or S3, the Resource Id matches the resource name.
-
For AWS EC2 and VPC, the Resource Id usually matches the randomly generated Id, e.g.
sg-001234d891234abcd. -
For most Azure resource types, the Resource Id is the full path, e.g.
/subscriptions/1234-1234-1234/resourceGroups/myResourceGroup/providers/microsoft.resource/resourceType/my-resource-name.
-
NotePlease Note: Cloud Risk Management
will apply exceptions immediately once you save them. You do not need to run Compliance scan to exclude the desired resources.
|
Apply rule changes to multiple accounts
You can change rule configurations and apply the same configurations to other or all
accounts in the organization.
- Make changes in any or all of the rule configurations available - Disable rule, Assign rule severity, or Set up rule exceptions
- Click Select other accounts
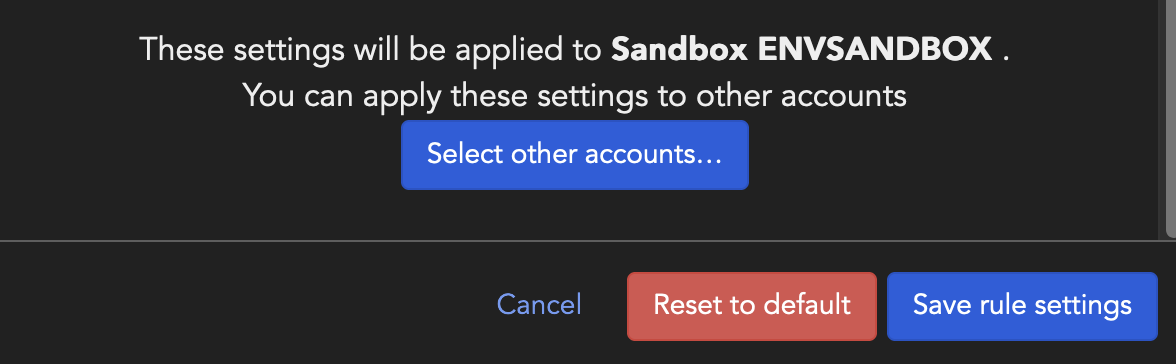
- From the list, select the accounts to which rule changes should be applied and Select accounts
Note
|