

Deploy a Service Gateway virtual appliance with Oracle Cloud Infrastructure (OCI).
If your environment does not have VVMware, Microsoft Hyper-V, or Nutanix AHV, you
can deploy the Service Gateway virtual appliance from the Oracle Cloud Console. Before
you begin, review the Service Gateway appliance system
requirements to ensure your virtual appliance has the settings needed to deploy the services you
want to use.
NoteThe steps contained in these instructions are valid as of October 2025.
|
Procedure
- Go to .
- Click Download Virtual Appliance.The Service Gateway Virtual Appliance panel appears.
- Select Oracle Cloud Infrastructure.
- Select a virtual appliance specification and click Download Disk Image to download a QCOW2 file.

Tip
Copy the registration token for later steps. The registration token will expire within 24 hours if not used. - To initiate the instance launch, sign in to the Oracle Cloud Console.
- Create a custom image of the Service Gateway virtual appliance.
- In the Oracle Cloud Console, search for Buckets.
- In the Buckets screen, create a new bucket, or select an existing one, then open the bucket.
- In the Objects section, click Upload.
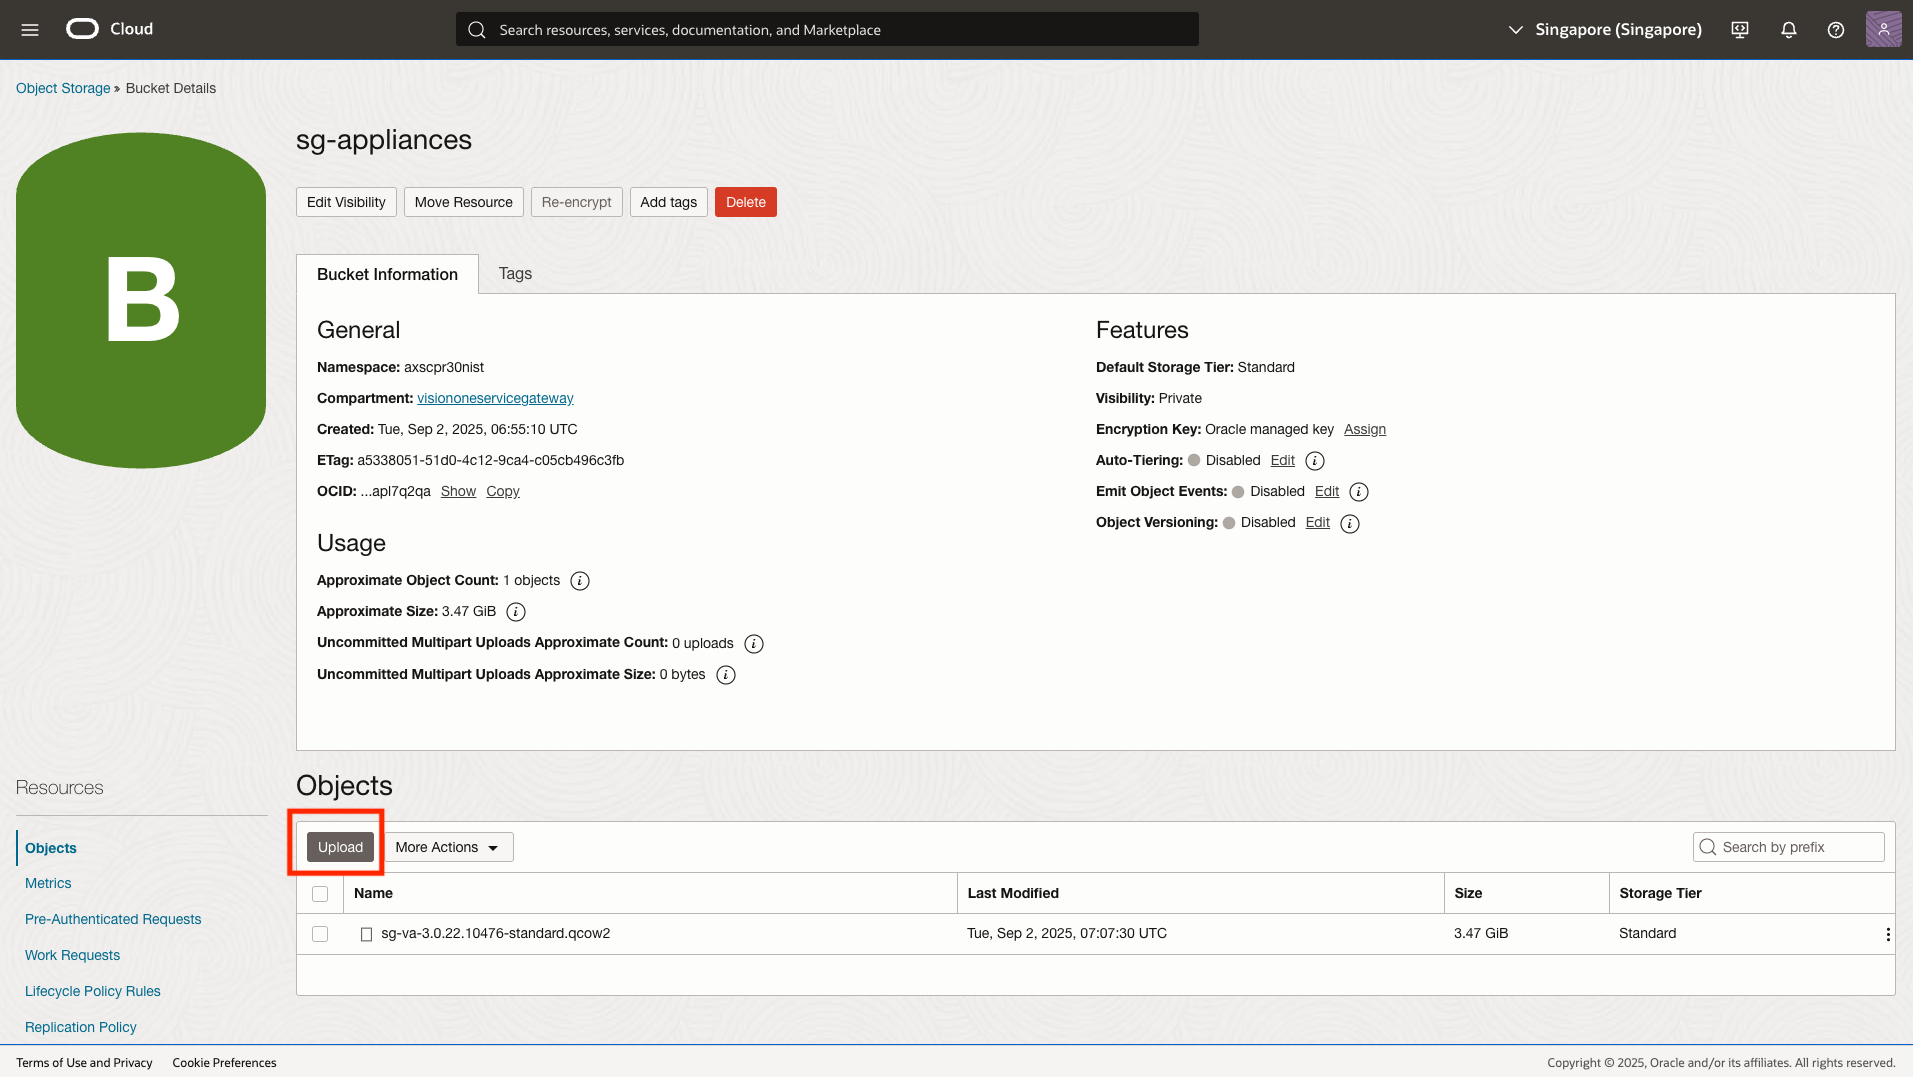
- In the Upload Objects screen, select the downloaded QCOW2 file.
- Click Upload. Wait until the image is completely uploaded.
- In the Oracle Cloud Console, search for Custom Images.
- In the Custom Image screen, click Import image to import the QCOW2 file you uploaded.
- In the Import Image screen, provide a name for the custom image.
- In the Operating system field, select Rocky Linux.
- Select Import from an Object Storage bucket, and select the desired bucket and QCOW2 file.
- In the Image type section, select QCOW2.
- Review the configuration, and click Import image.
- Create a Network Security Group for the Service Gateway virtual appliance you deploy.
- In the Oracle Cloud Console, search for Virtual Cloud Networks.
- Open the Virtual Cloud Network you would like to have for Service Gateway virtual appliance, and click the Security tab.
- In the Network Security Groups section, click Create Network Security Group.
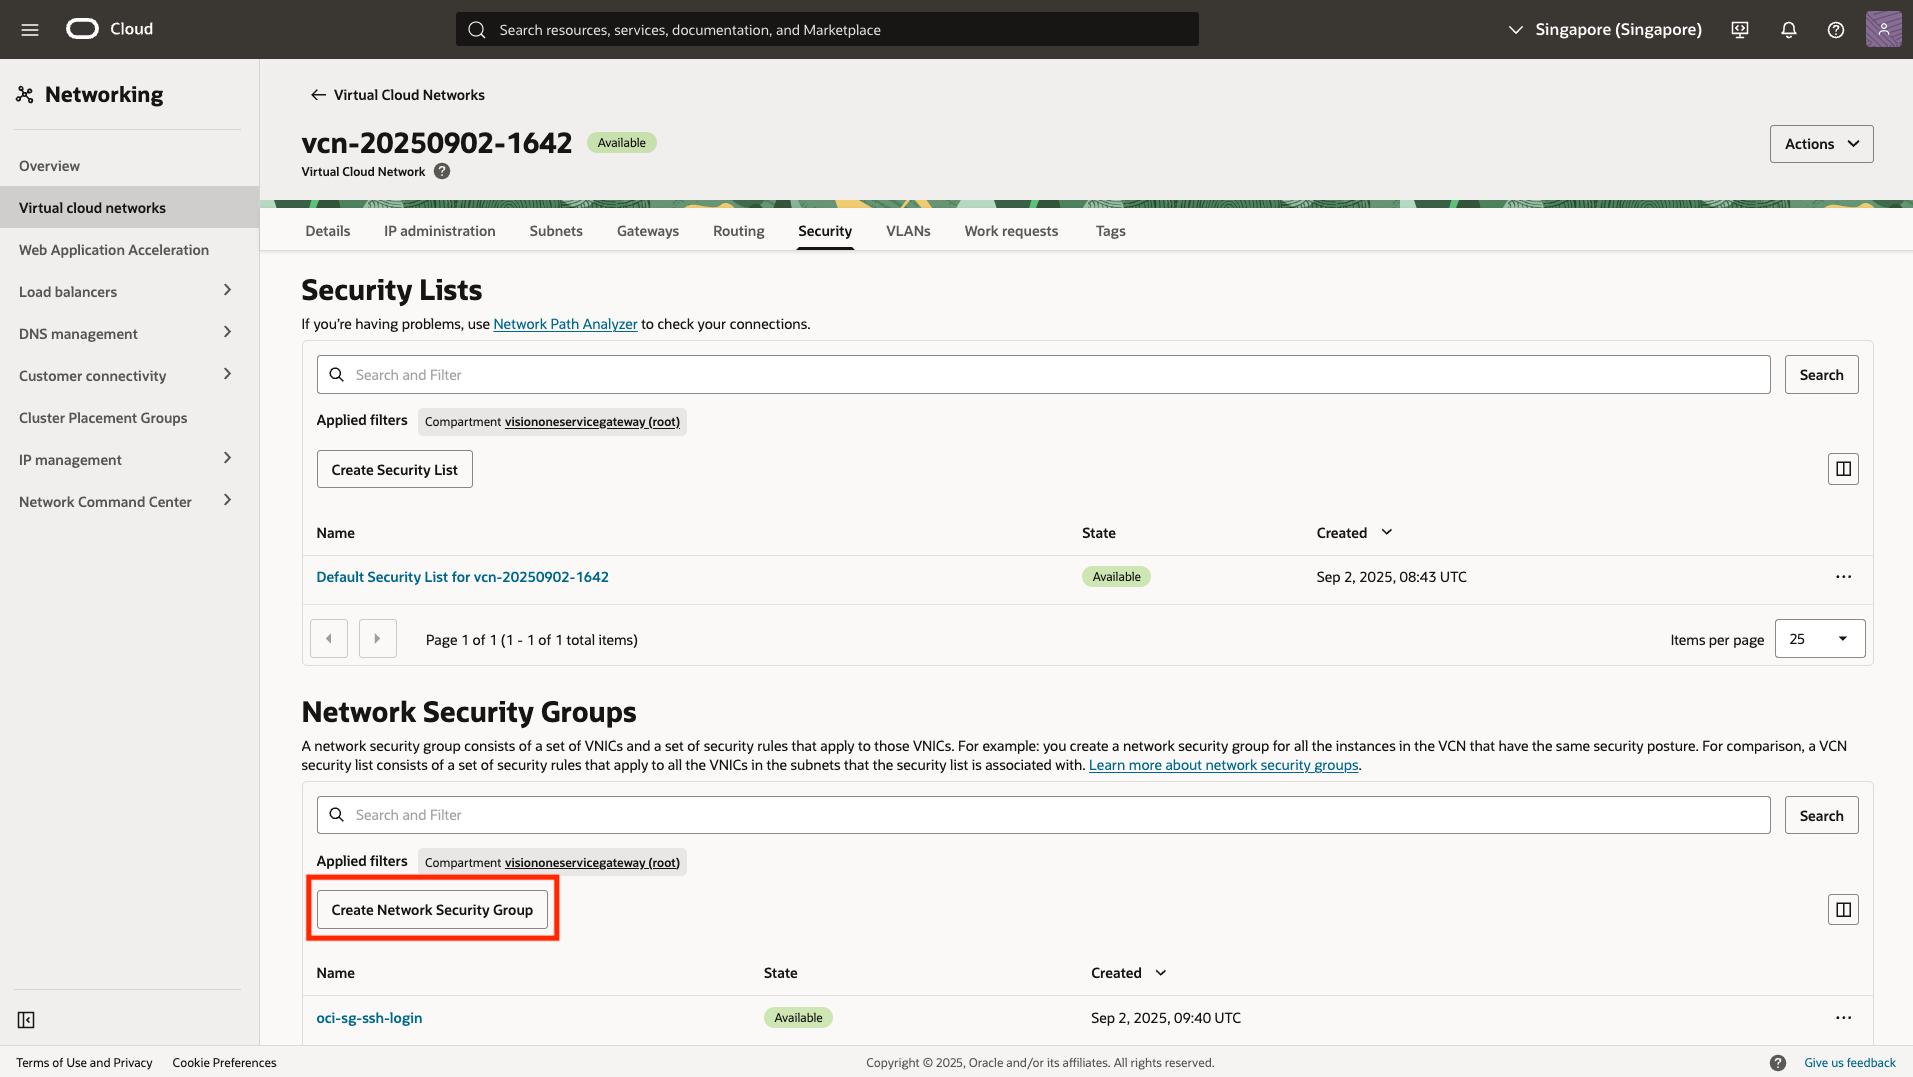
- In the Create Network Security Group screen, provide a name for the Network Security Group.
- In the Rule section, add the following rules to the Network Security Group.ServiceDestination port rangesProtocolActionDescriptionSSH22TCPAllowFor accessing Service Gateway virtual appliance CLISH commandHTTP80TCPAllowService enabled queries for on-premises Active Directory servers, connected Trend Micro products (such as endpoint agents), Predictive Machine Learning, File Reputation Services, or Third-Party IntegrationHTTPS443TCPAllowService enabled queries for on-premises Active Directory servers, connected Trend Micro products (such as endpoint agents), Predictive Machine Learning, File Reputation Services, or Third-Party IntegrationCustom TCP5274TCPAllowWeb Reputation Services or Web Inspection Service queriesCustom TCP5275TCPAllowWeb Reputation Services or Web Inspection Service queriesCustom TCP8080TCPAllowForward Proxy Service listening port for connectionCustom TCP8088TCPAllowZero Trust Secure Access On-Premises Gateway listening port for connection
- Review the configuration, and click Create.
- Create a VM instance.
- In the Oracle Cloud Console, search for Instances.
- In the Instances screen, click Create instance.
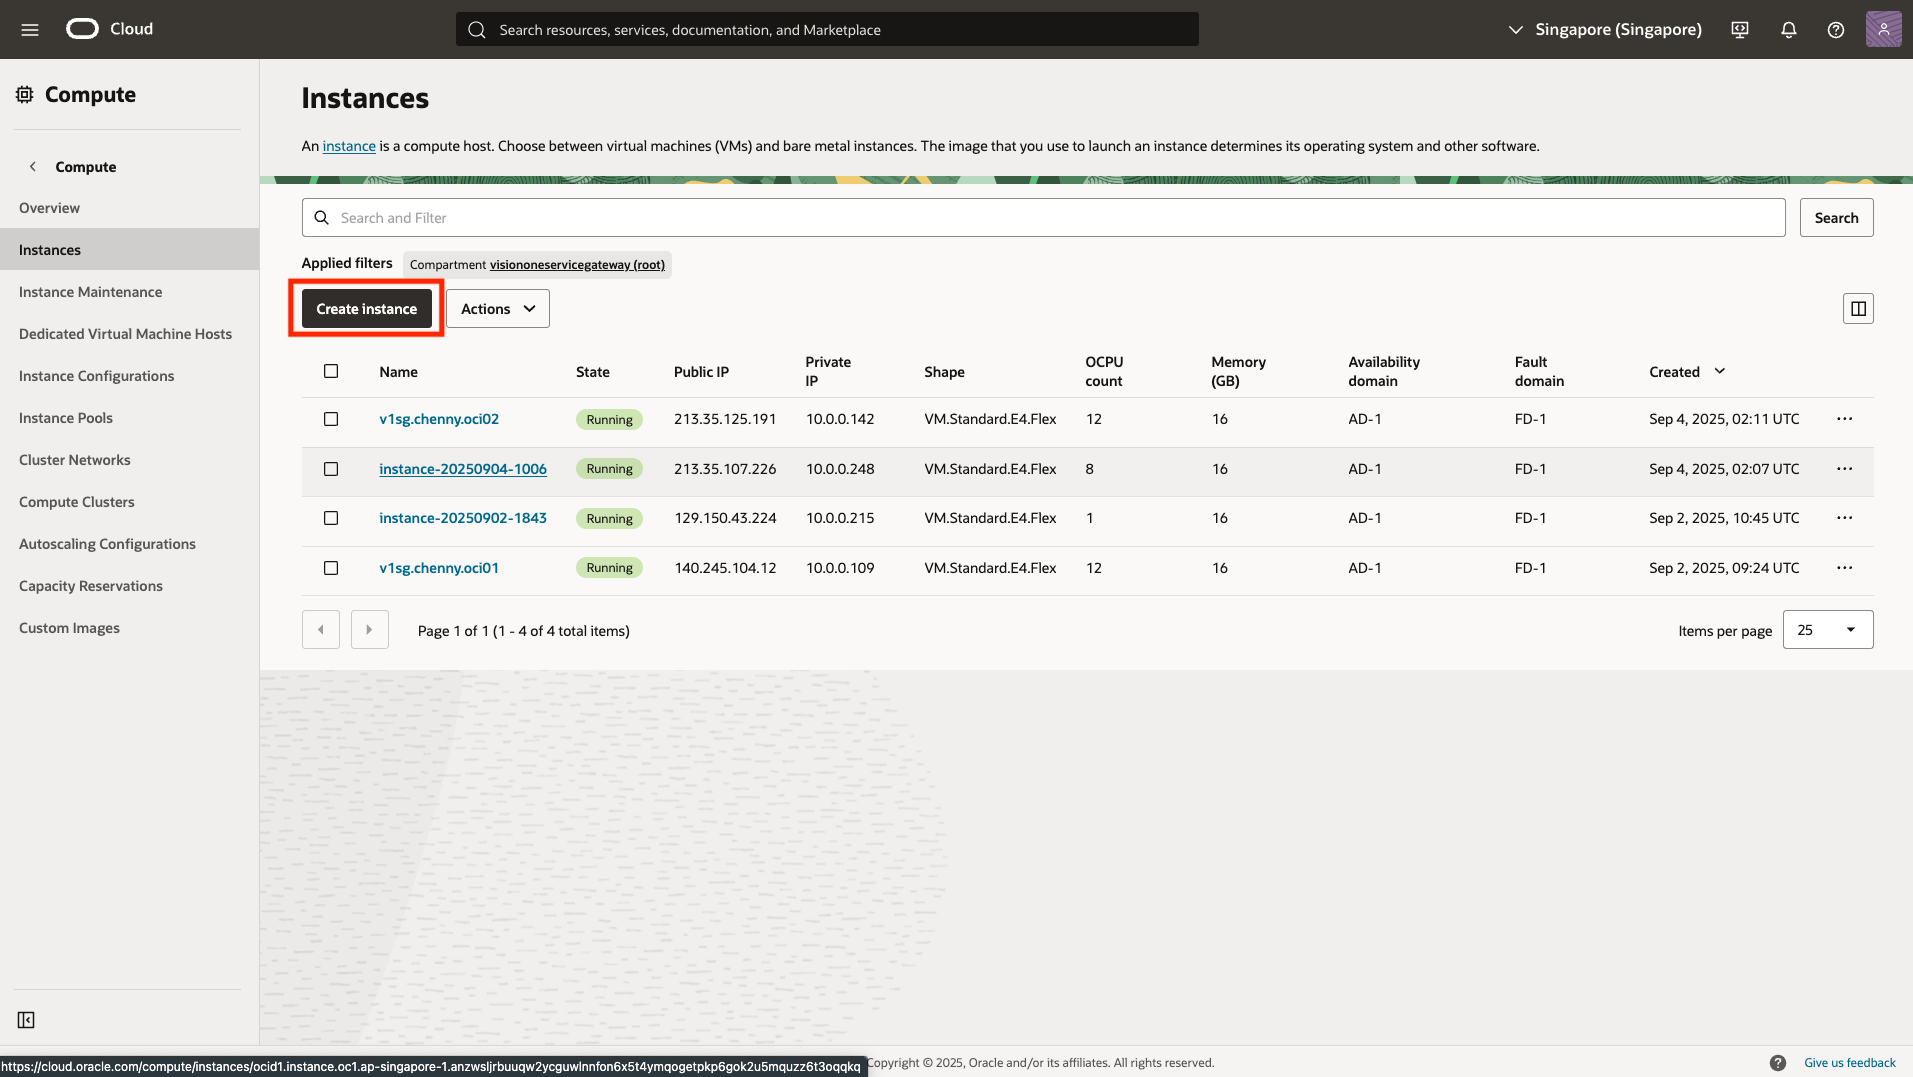
- In the Create compute instance screen, provide a name for the VM instance.
- In the Image and shape section, click Change image.
- In the Select an image screen, select My images and Custom images.
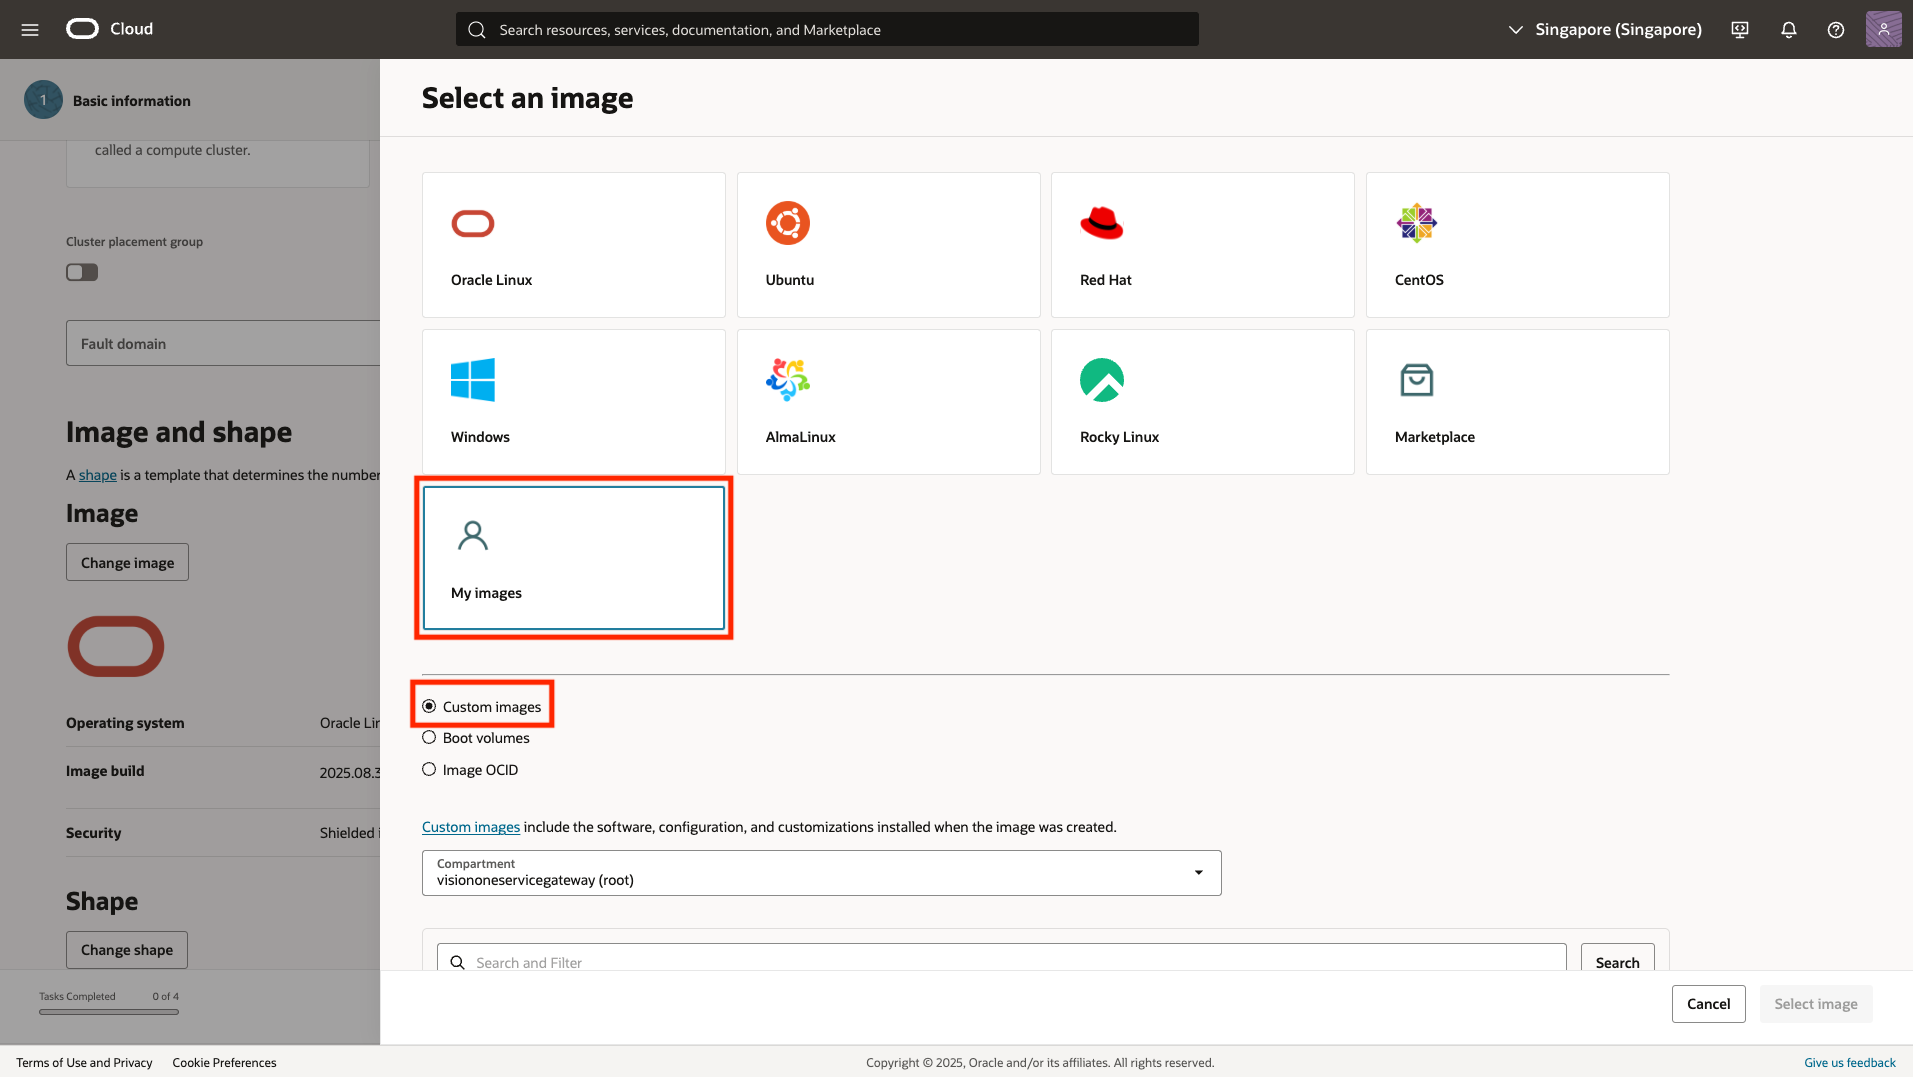
- Select the Service Gateway QCOW2 custom image.
- Click Select image.
- In the Shape section, click Change shape.
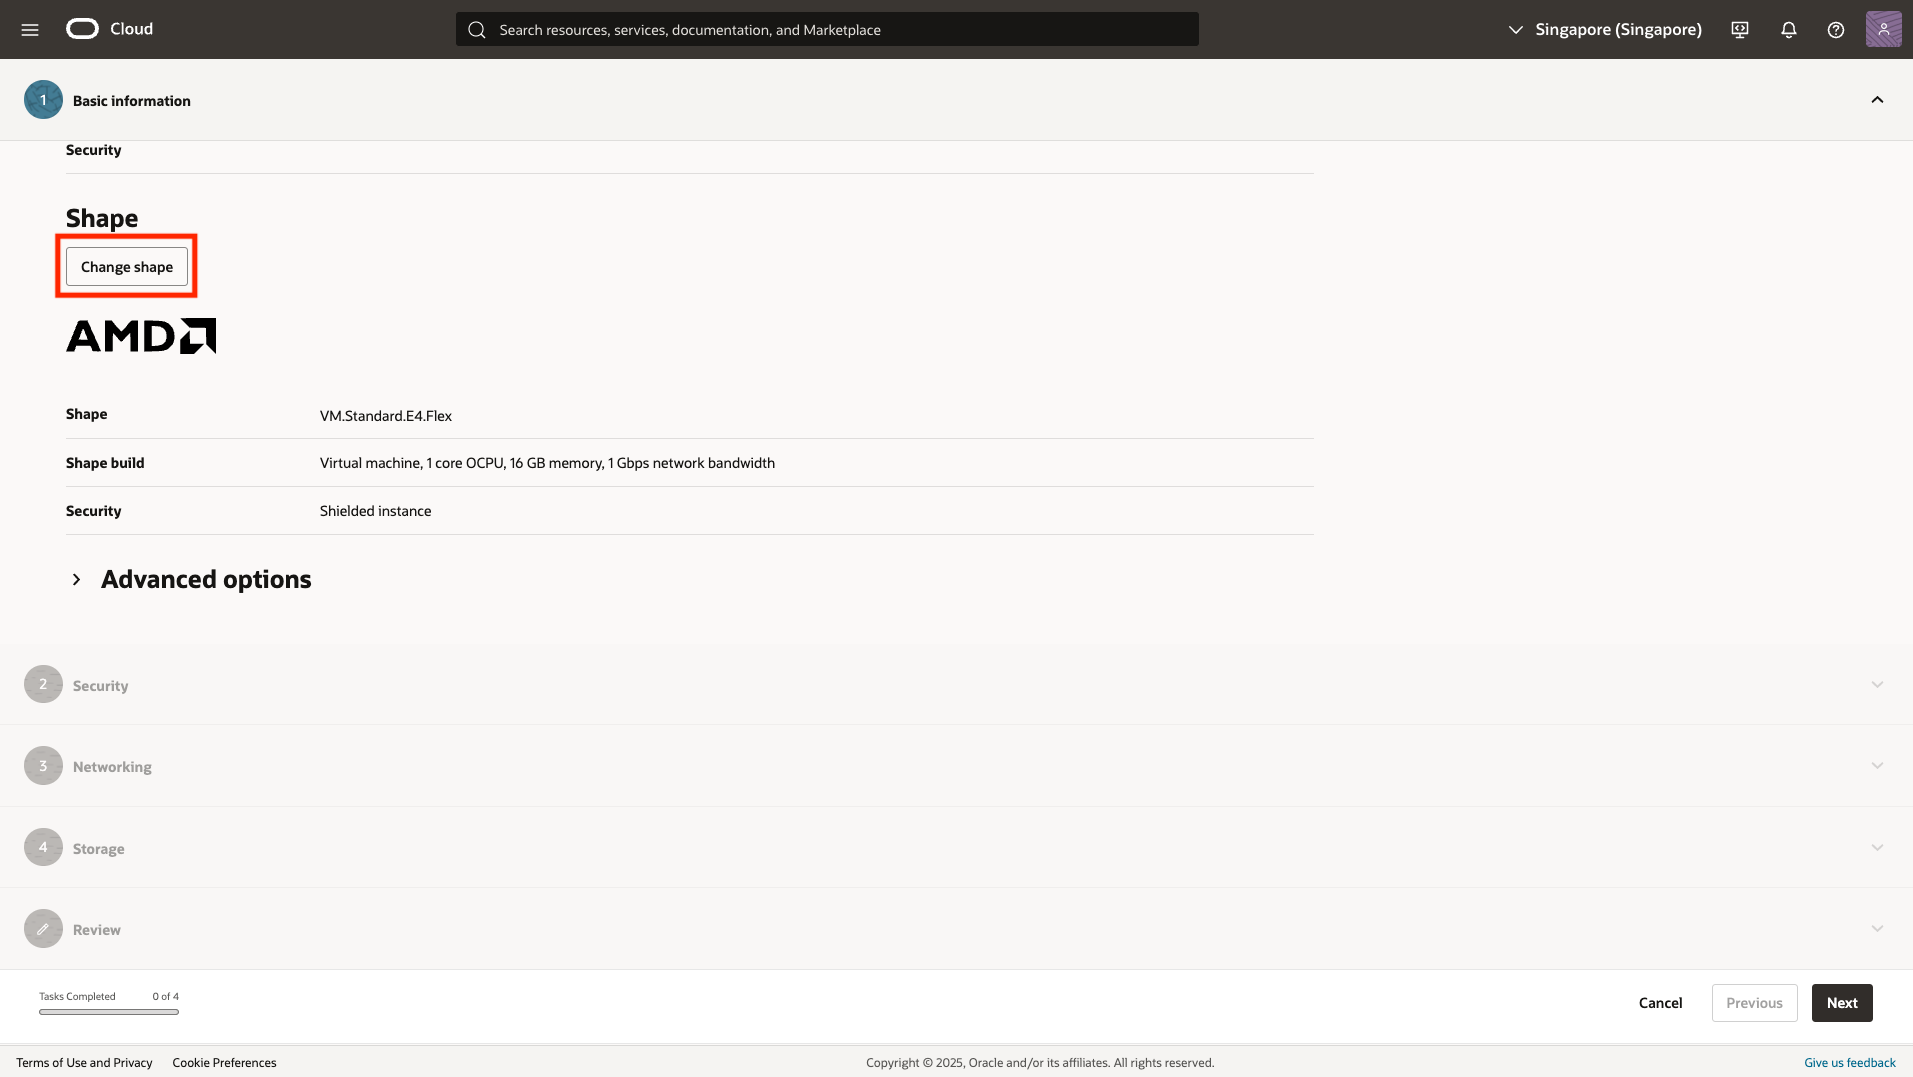
- In the Browse all shapes screen, choose the CPU with the preferred specification.

Note
The default machine type is VM.Standard.E4.Flex customized with 8 OCPU and 12 GB memory (minimal package) or 12 OCPU and 16 GB memory (standard package). For more information, see Service Gateway appliance system requirements. - Review the configuration. Click Select shape, and click Next to go to Networking.
- Provide a VNIC name, and select the existing Virtual Cloud Network and subnet.
- In the Primary VNIC IP addresses section, expand the Advance options section.
- Enable Use network security groups to control traffic. Select the Network Security Group you previously created.
- In the Add SSH keys section, provide the preferred configuration.
- If you would like to extend the storage of this VM instance, click Next to go to Storage.
Note
The default storage capacity is 200 GB for the minimal package and 500 GB for the standard package. For more information, see Service Gateway appliance system requirements. - Click Next to go to Review.
- Review the configuration of the VM instance, and click Create.
- After the deployment is completed, the Service Gateway virtual appliance is ready to connect and configure when State shows Running.
- Connect to the VM instance.
- Open a terminal and run the following command:
ssh -i path/to/ssh/private/key admin@<public-ip-address> - Type enable and press the ENTER key to enable administrative commands. Provide your password when asked.The command prompt changes from > to #.
- Open a terminal and run the following command:
- Configure the required network settings using the following CLISH commands:
Configure network primary ipv4.static <interface> <ip_cidr> <gateway> <dns1> [dns2] [cni]

Configure static IPv4 network settings for the primary network interface

<interface>: Name of the network interface (for example, eth0)

<ip_cidr>: IPv4 address of the network interface in CIDR notation

<gateway>: Gateway router address

<dns1>: Primary DNS server address

[dns2]: Secondary DNS server address

[cni]: Internal network address pool (IP address ending in .0.0)
- To register the Service Gateway virtual appliance to Trend Vision One, use an SSH tool, such as the latest version of PuTTY, and using an account with
administrator privileges, type the following command.
register <registration_token>You can obtain the token from the same screen you download the virtual appliance on Trend Vision One (step 4).Note
-
If your environment uses a local Network Time Protocol (NTP) server, make sure the NTP server synchronizes with the local time for successful registration.
-
Trend Micro recommends using an SSH client to easily copy and paste the registration token.
-
- Use the CLI to configure other settings, if required.For more information on available commands, see Service Gateway CLI commands.For details on setting up a virtual appliance with two network cards, see Service Gateway Virtual Appliance dual network card configuration.